Case Study: A Vote For Lightroom
Introduction
I am often asked; “Can Adobe Lightroom produce a quality photo file suitable for printing?” The answer is a definite, yes. You can create top quality photo files using Lightroom (LR). It is a powerful photo editing software.
Like most things worth learning, LR does require a concentrated effort to maximize its potential. How quickly you learn depends on your level of interest and your willingness to practice regularly.
The next question most often asked is; “Should I just skip LR and go straight to learning Photoshop (PS)?” My advice and answer is NO! Just because PS has name recognition and marketed as a ‘professional’ editing software, it does not mean its use is required to create top quality photo files.
Your future will be much less frustrating if you learn and use LR first. In fact, you may be wasting a lot of time if you skip LR and attempt to learn PS first. It is much like learning photography. If you skip learning the fundamentals your future in photography will likely be fraught with frustration and at some point a need for backward learning.
It is true that Photoshop is a powerful editing software. There are benefits to using it. Some PS tools are more advanced, more precise or unique. But the fact is, expert LR users can achieve most outcomes PS users can achieve. Moreover, Adobe’s constant update of the LR toolset makes it an equally relevant photo editing software. Most photo enthusiasts will be challenged for years using LR. It is packed with features and tools.
Like most software programs you will use some of LR’s tools all the time. Other tools you will use sparingly or rarely. Experiment and learn its full capability then decide what to add to your personal tool bag and what you can leave on the toolbar menu.
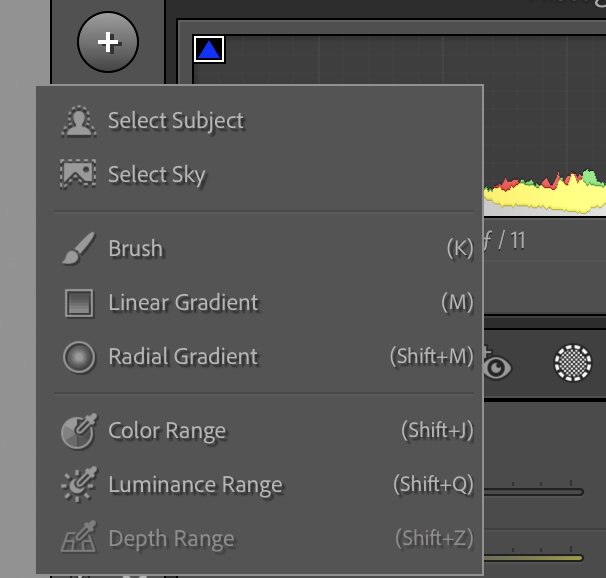
For instance, being able to select and edit specific, detailed areas within an image can turn an average image into a dynamic final photo. This makes LR’s SELECT and MASKING tool (below) an important tool to learn in my playbook. The tool allows you to select and isolate the sky, the main subject, a particular brightness range (luminance), or a particular color range. Plus how you select is flexible. You can make your selection using a brush, a linear gradient tool, or a radial gradient tool.
There are some tools you may not find helpful. For instance, as a nature and landscape photographer the red eye elimination tool may not be something you use frequently!
Conscious Composition & Focused Editing Intention
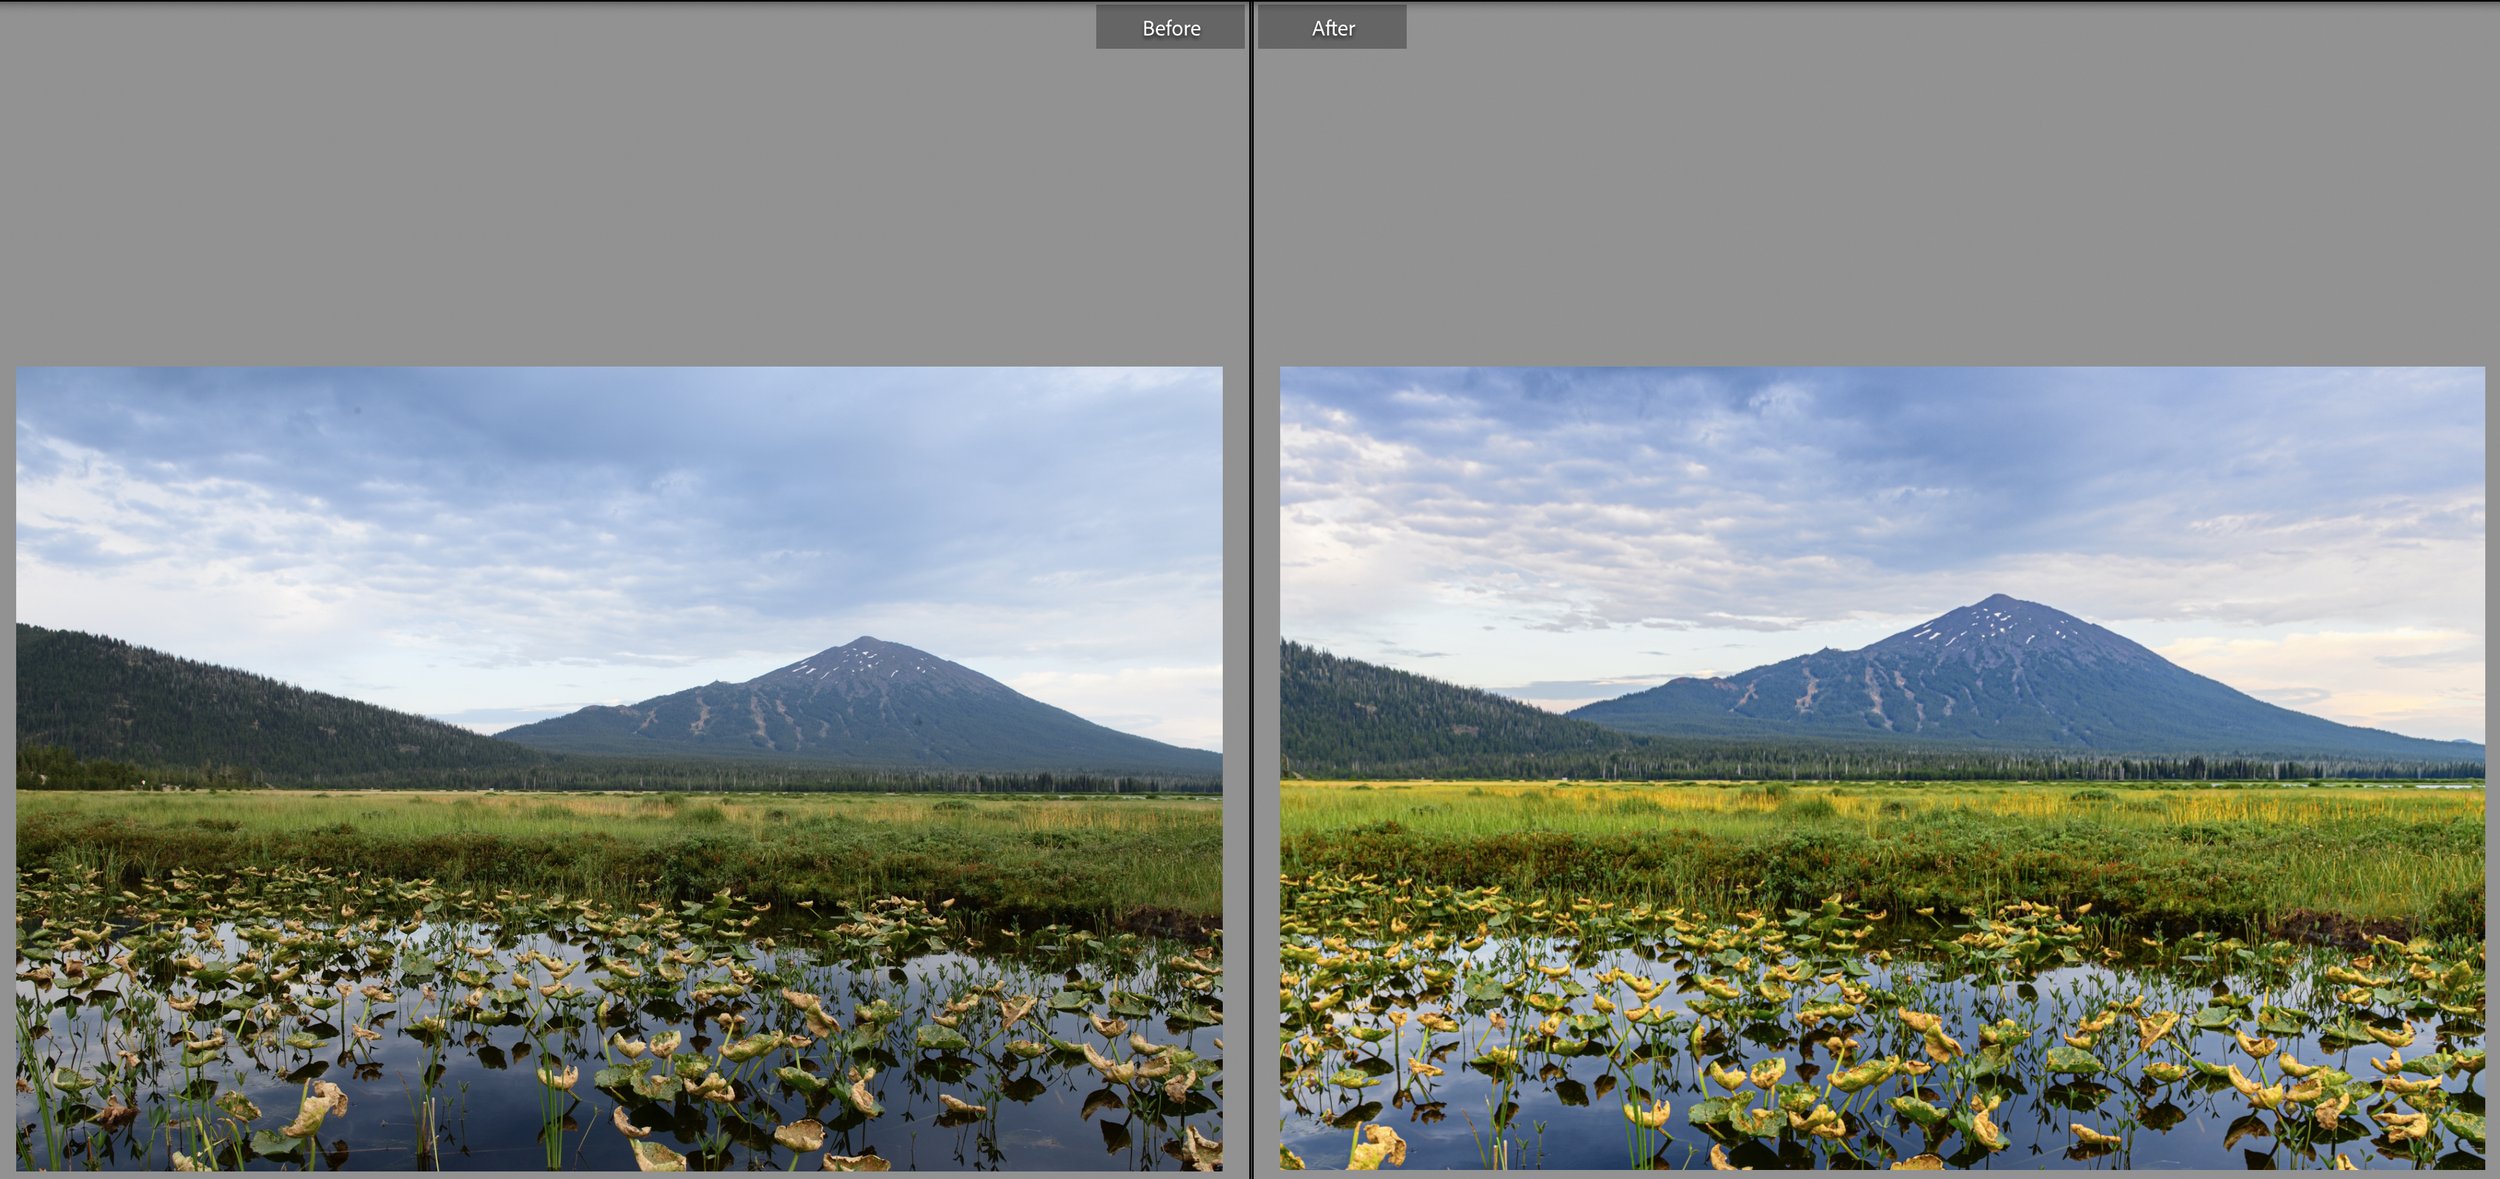
The photo included here was taken during the meadow sunset session. The light was average and colors were muted. But I made the best of it. I incorporated an interesting foreground element to draw the viewer in. Lightroom was the only editing software I used on this image.

With a little imagination, and some post processing visualization, I decided to create an image that would have a mixed feel to it. A foreground that suggests a late summer look with yellowing foliage, and a sky that suggests a potential coming storm.
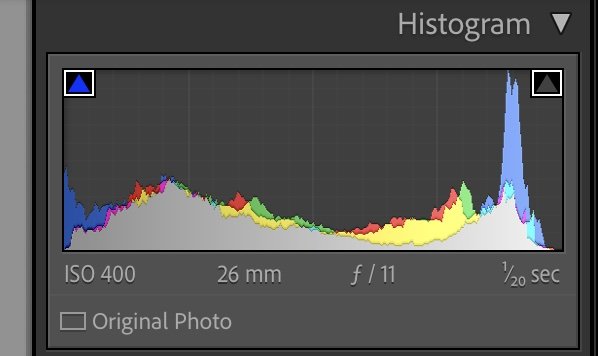
The image was taken with a Nikon D850, Nikon 24-70 mm f/2.8 at 26mm. My aperture was f/11 with a shutter speed of 1/20 of a second and an ISO of 400. With a plan to feature the sky in the final file, I exposed for the highlights. Therefore, my histogram was a bit shifted to the left. I knew I could pull detail back from my shadows if necessary.
My wide angle composition was a bit problematic. The challenge was to emphasize the foreground water plants while not making the mountain an ‘also included element’. The distance between the camera and the mountain resulted in a less than prominent mountain with the wide angle lens. See the BEFORE and AFTER comparison slide below. More on how I dealt with this in #7 of the edit workflow.
Below is a brief summary of my edit workflow.
Imported files directly from my camera into Lightroom Classic using a hard wire connection.
Specific image selection using these criteria; Is the histogram editable?, is the full frame subject matter sharp?, & Does the composition represent and compliment my final vision of the image?
A methodical edit workflow process to include; global changes first, regional next and details last
Global edits
Minor overall adjustments; decreased exposure slightly but brighten highlights, added contrast, added a bit of dehaze, added texture, added saturation - all of these changes were very minimal
Regional edits:
Used linear gradient tool to select from the bottom of the frame to the bottom of the mid-ground trees and added yellow & orange saturation so that these colors would contrast with the dark water, this edit also added a line of yellow across the horizontal line splitting the frame,
Selected the sky using the ‘select sky’ tool, added sky texture & increased yellow color to contrast with the deeper blue clouds,
Used the luminance selection tool to select the foreground orange brightness level, then increased brightness of these leaves and some of the horizon yellows.
Detail edits;
Removed dust spots from sky and a few other minor tweaks
Finally, I used the Transform tool to make the mountain larger relative to the foreground. This is a bit tricky. I wanted to make sure the final result was believable with appropriate proportions maintained. See the Transform adjustments below.
And there you have it. I’ve also included the BEFORE and AFTER for your review.
The point of this exercise is to demonstrate the power and capability of LR as a photo editing software. Understand its power and potential depends on the user’s commitment to learn it. Simply using a more powerful editing software like Photoshop will not automatically result in better outcomes.
I am always open to feedback, comments or questions about these blogs. If there is a particular interest in a specific topic send it to me.
Cheers,
Steve